Upload Component for Flows
You can upload files directly to Google Drive from a Salesforce Screen Flow. A common use case is allowing users to attach customer related documents to specific Google Drive folders created for each customer.
Prerequisites
Make sure you have followed the setup instructions to configure the app.
Example Use Case - Store Account NDA files
The following scenario illustrates the concept, and you can apply the same pattern to any other type of file upload or business process in Salesforce.
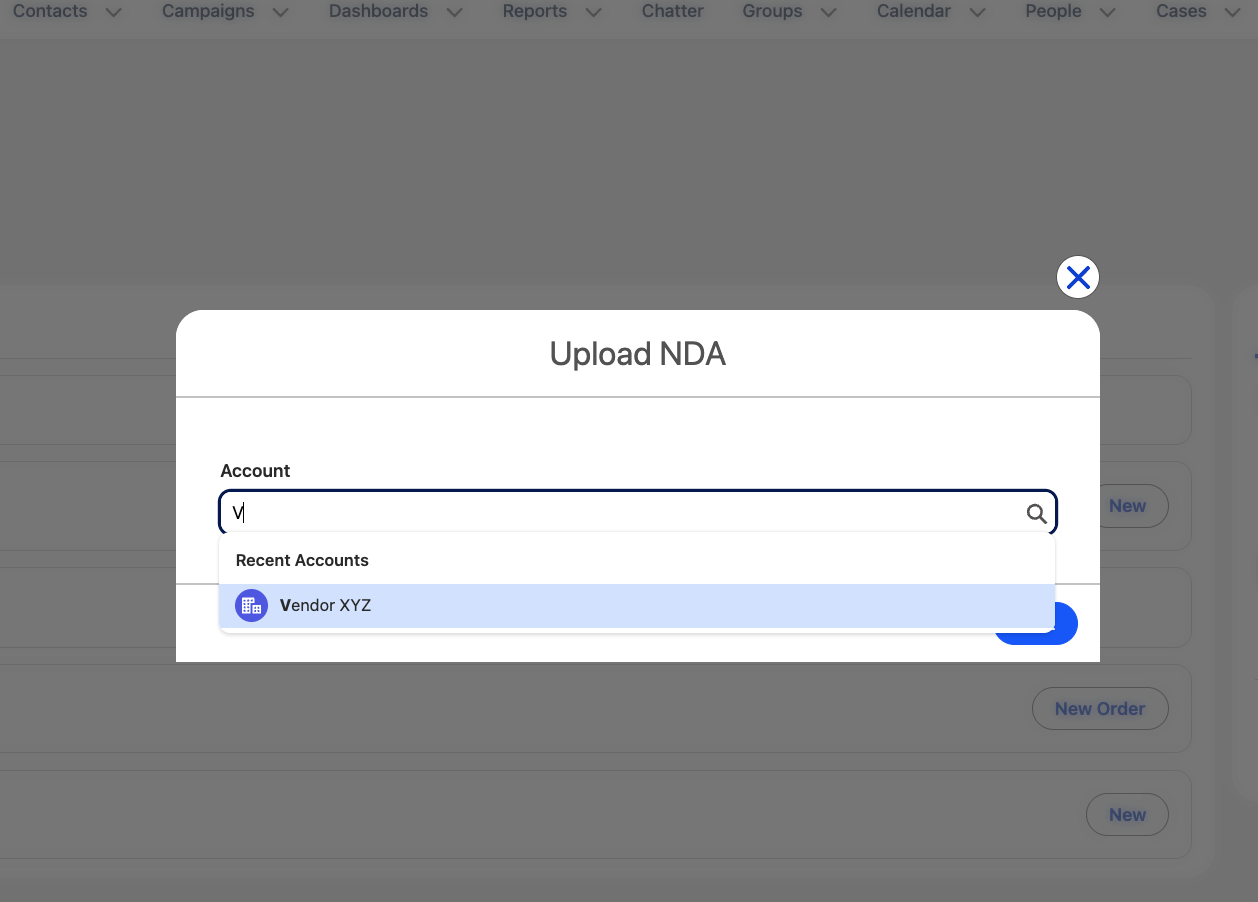
In this example, users upload NDA (Non - Disclosure Agreement) files for an Account using a Salesforce Screen Flow with the File Upload component. The flow lets users select the appropriate Account, attach the NDA document, and automatically store it in that Account’s corresponding Google Drive folder.
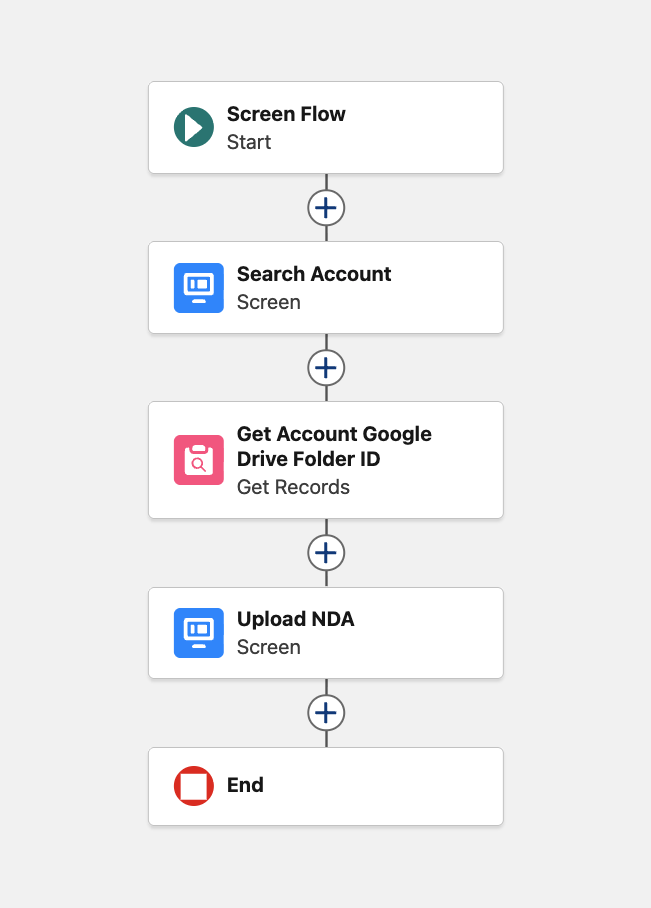
Upload NDA files to Google Drive - Screen Flow
-
Go to Setup > Flows and select New Flow.
-
Select Screen Automations and Screen Flow.
-
The following image illustrates the flow we’ll build step by step. First, you’ll search for an Account. Next, you’ll select the desired files, and it will be automatically transferred to Google Drive.
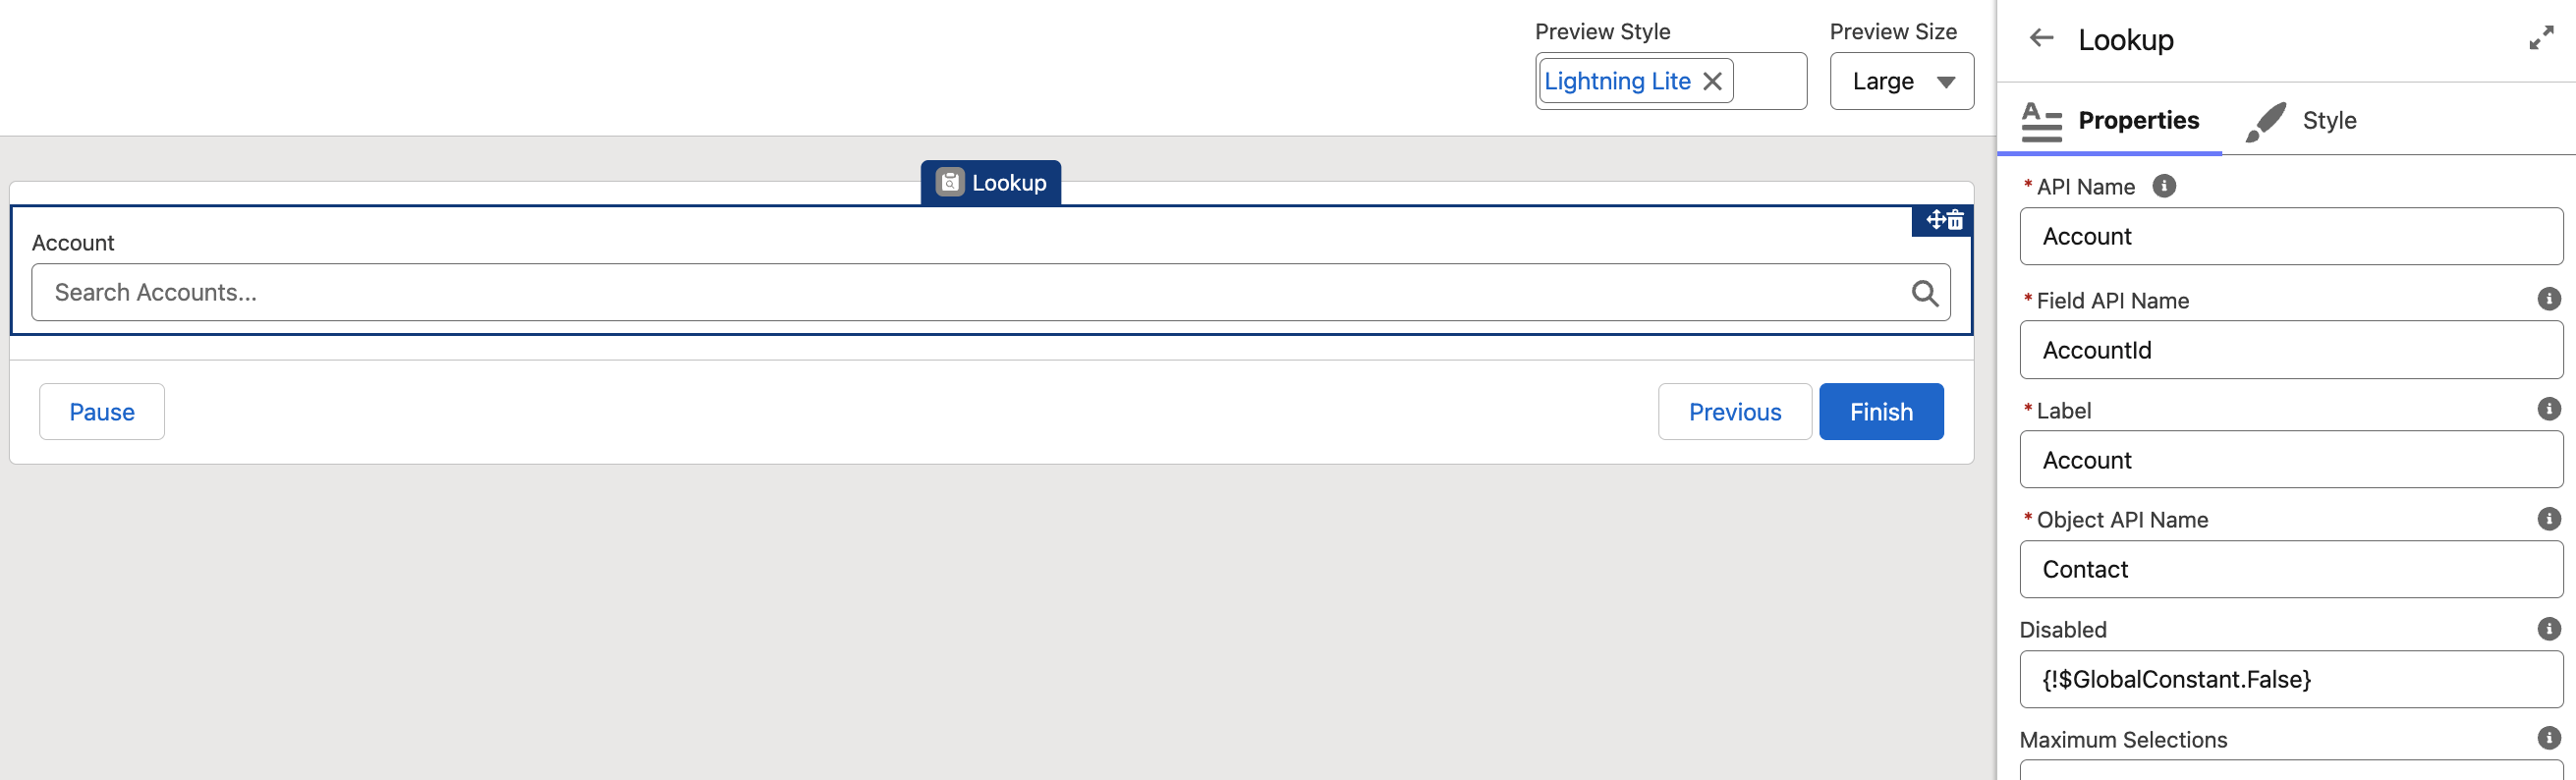
Screen - Search Account
Locate the Lookup component in the list and configure it for your target object. In this example, the target object is Account, but you can select the options that best fit your own use case.
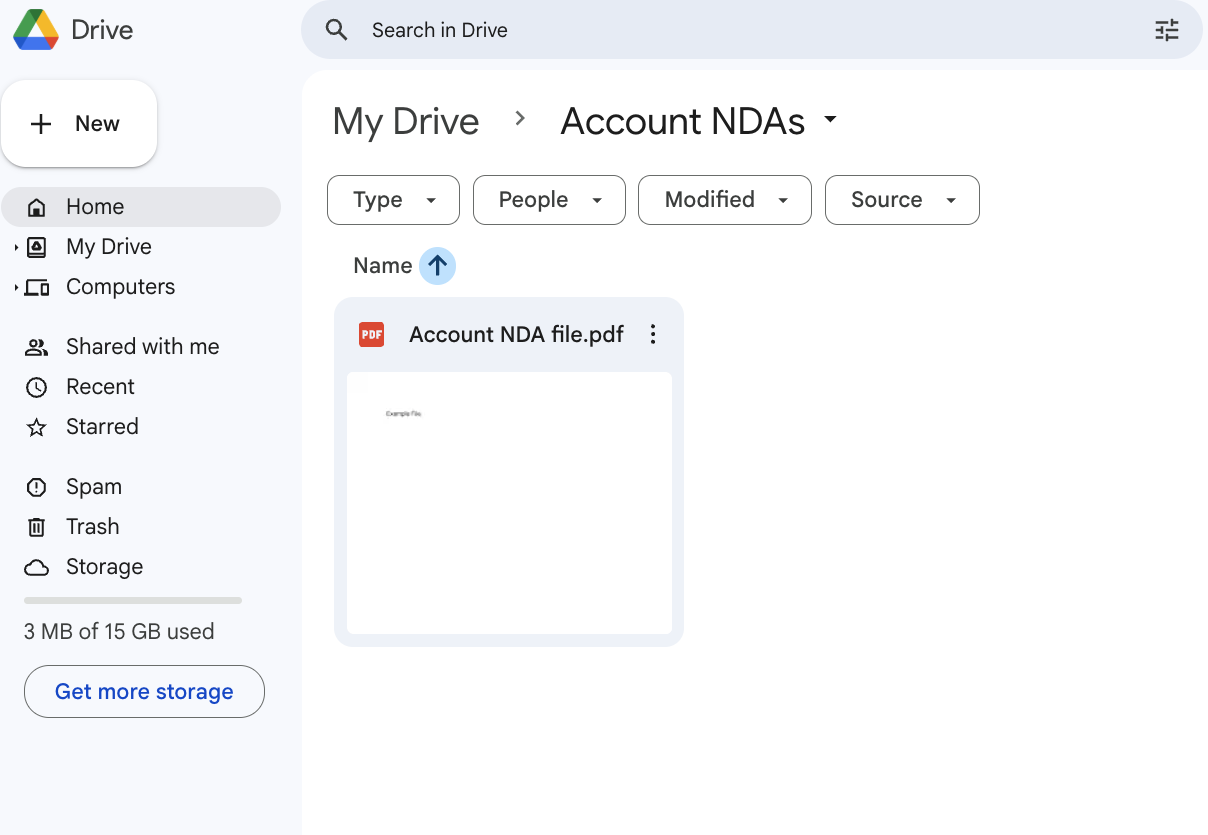
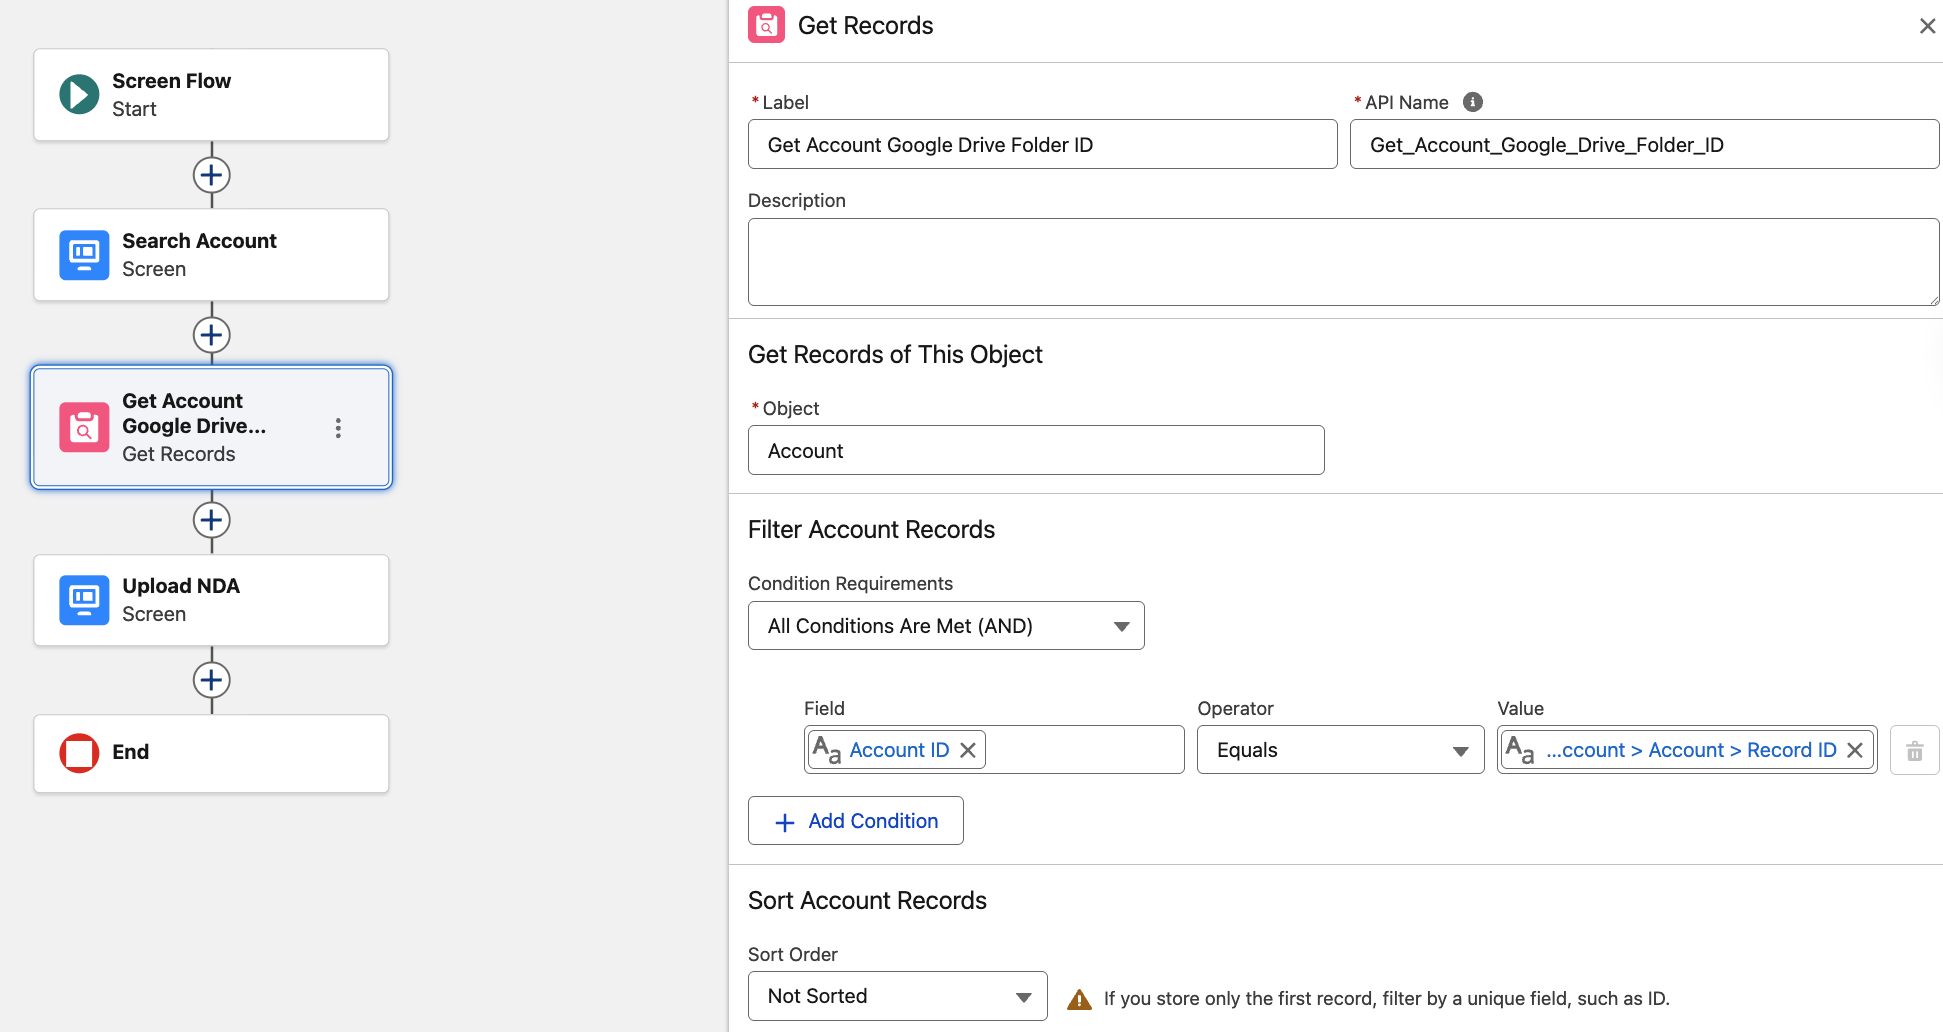
Get Account Google Drive Folder ID
For the upcoming component, we’ll need a Google Drive Folder ID. You can either hardcode it or pull it dynamically, in the example below, the value is fetched directly from the Account → GDriveFolderId field.
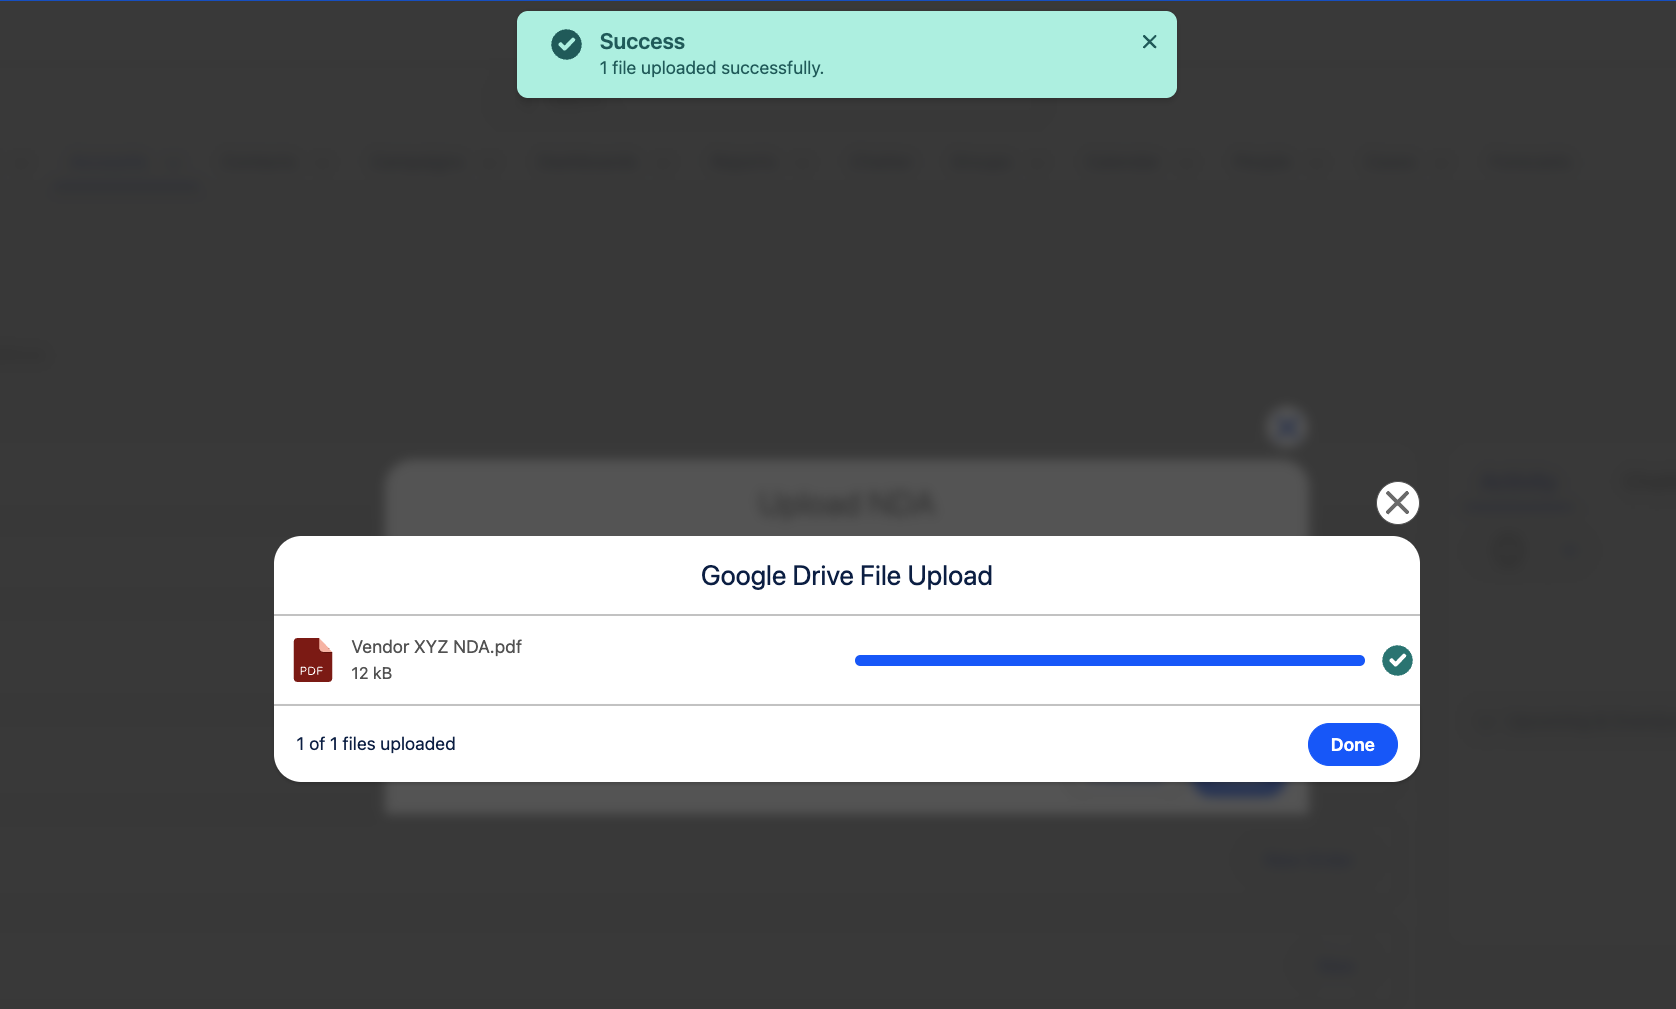
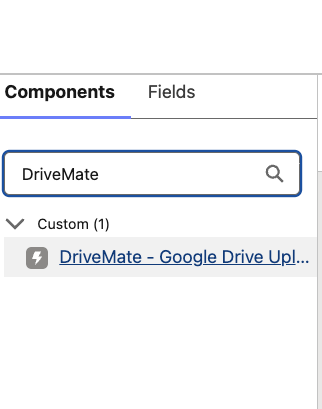
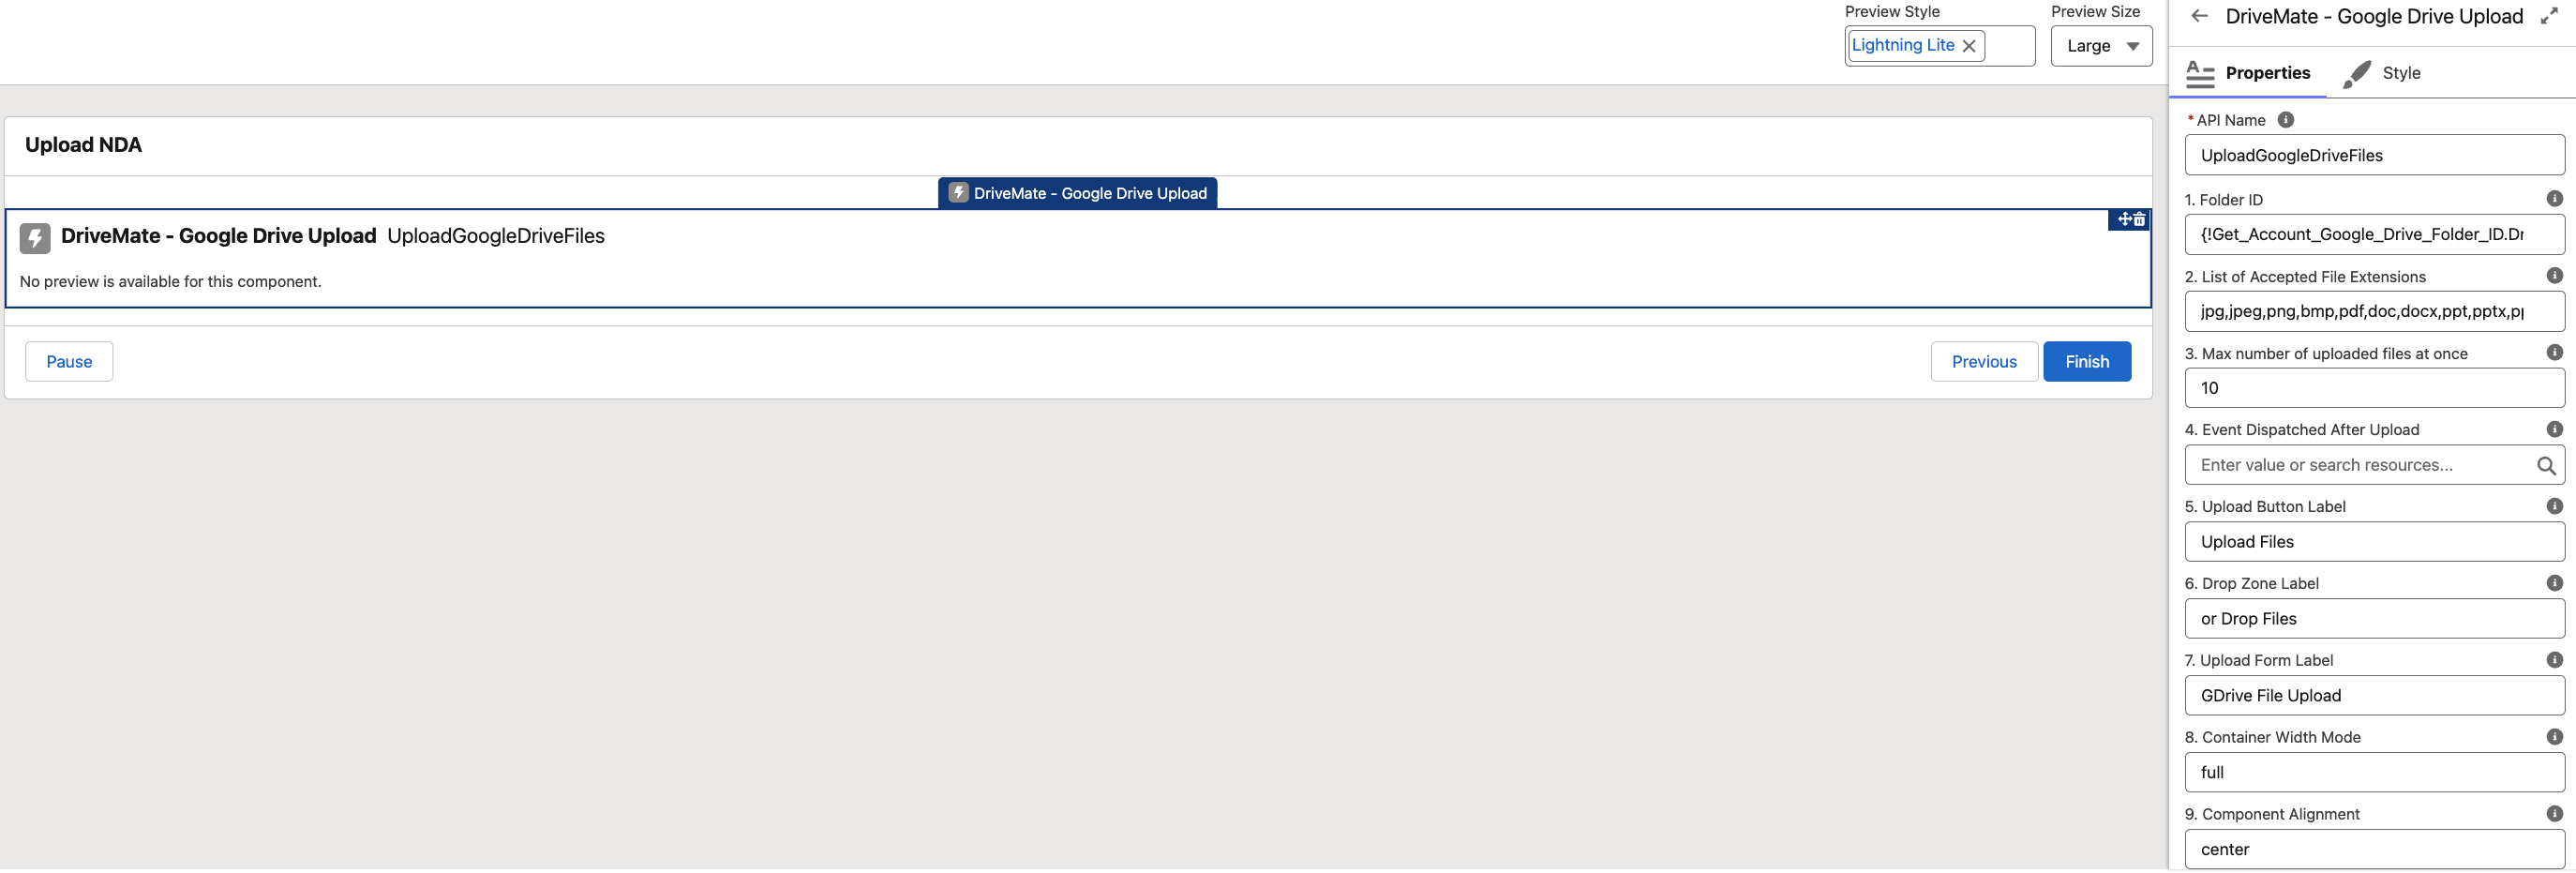
Upload NDA (DriveMate - Google Drive Upload Component)ą
Select DriveMate - Google Drive Upload component (under Custom) and configure it as needed.
The following parameters are available:
- API Name - Unique Id used for automation
- Folder Id - Id of Google Drive Folder where the files will be uploaded. (In our case value fetched from above Get Account Records)
- Idea: You might use the Account field value that stores the Account’s Google Drive Folder ID as the Parent Folder ID. More details about this setup can be found in the Prerequisites section.
- List of Accepted File Extensions - Comma-separated list of file extensions that will be accepted (without spaces).
- Max number of uploaded files at once - Max number of files that can be uploaded at once.
- Event Dispatched After Upload - Event that will be dispatched after the file upload is complete.
- Upload Button Label - Label displayed on the upload button.
- Drop Zone Label - Label displayed on the drop zone.
- Upload Form Label - Label displayed above the upload button.
- Container Width Mode - Determines whether the component takes all available space or only the space needed for the content.
- Component Alignment - Alignment of the upload component.
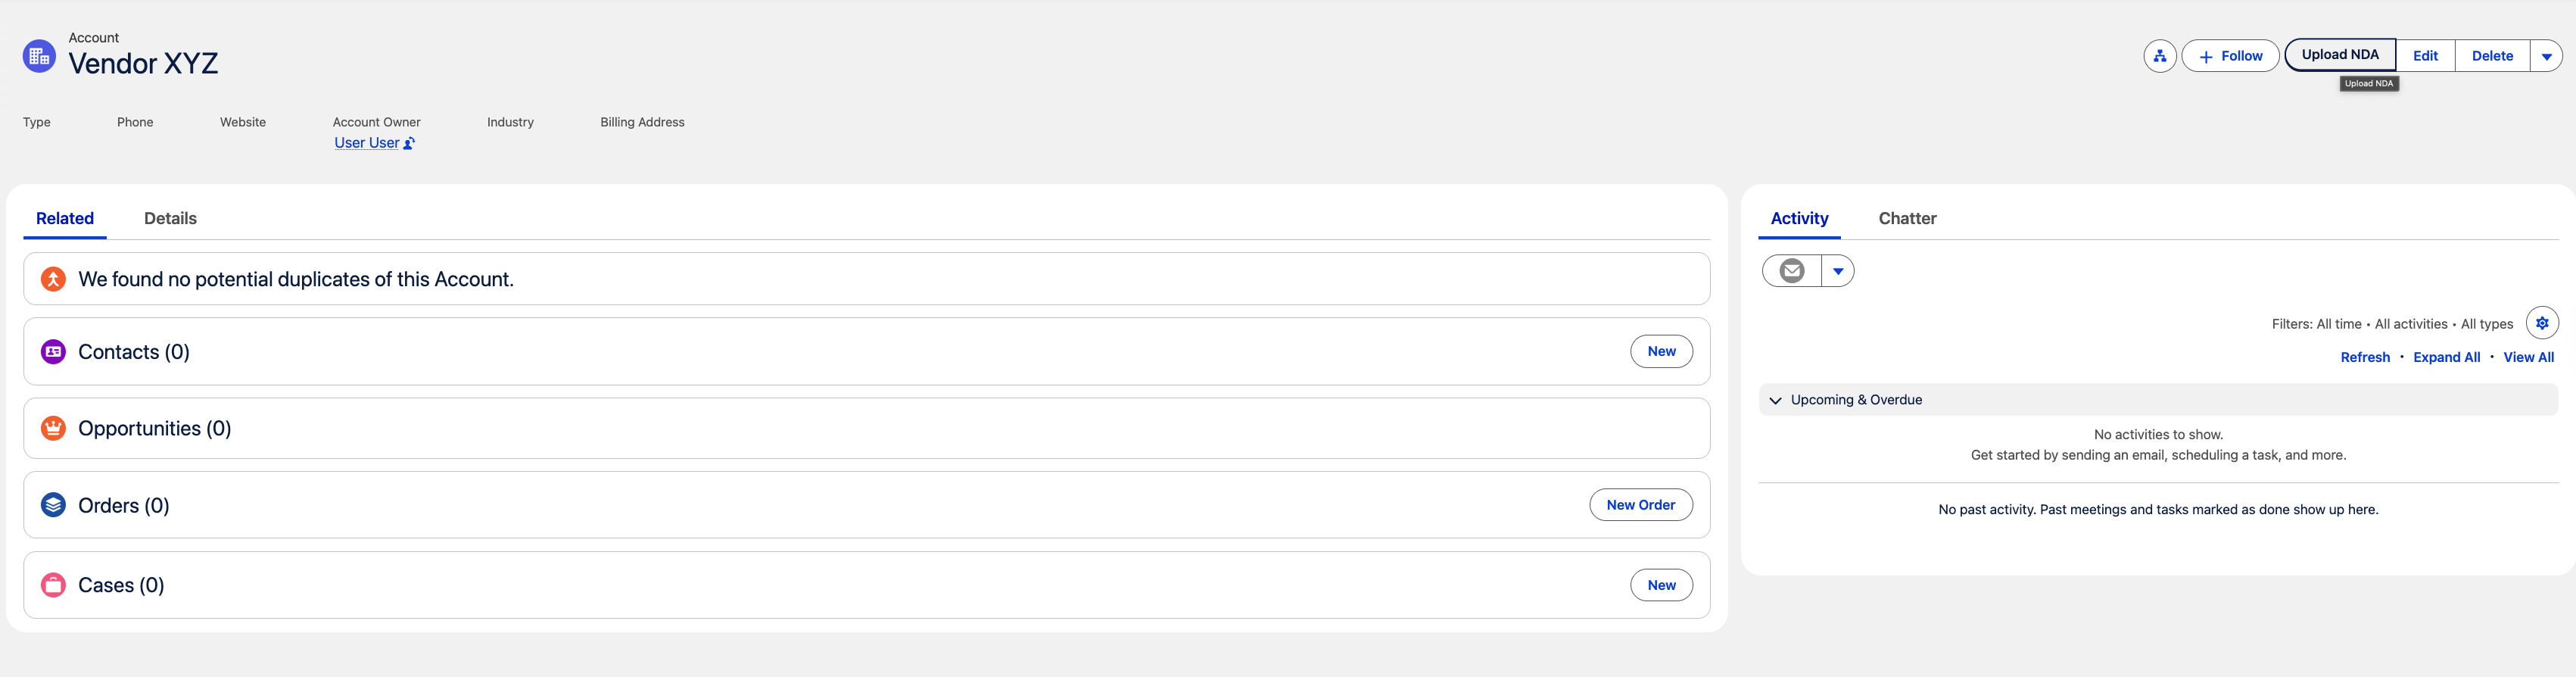
Release the solution to production
- Save and activate the Screen Flow.
- Navigate to Setup > Object Manager, and select Account.
- Go to Buttons, Links, and Actions, then click New Action.
- Set the Action Type to Flow, choose the flow you created earlier, enter a label and name, and save your changes.
- Add the new action to the relevant Account page layout or Lightning page (Flexipage) so that it’s visible to users where needed.
Ready to Use the Solution